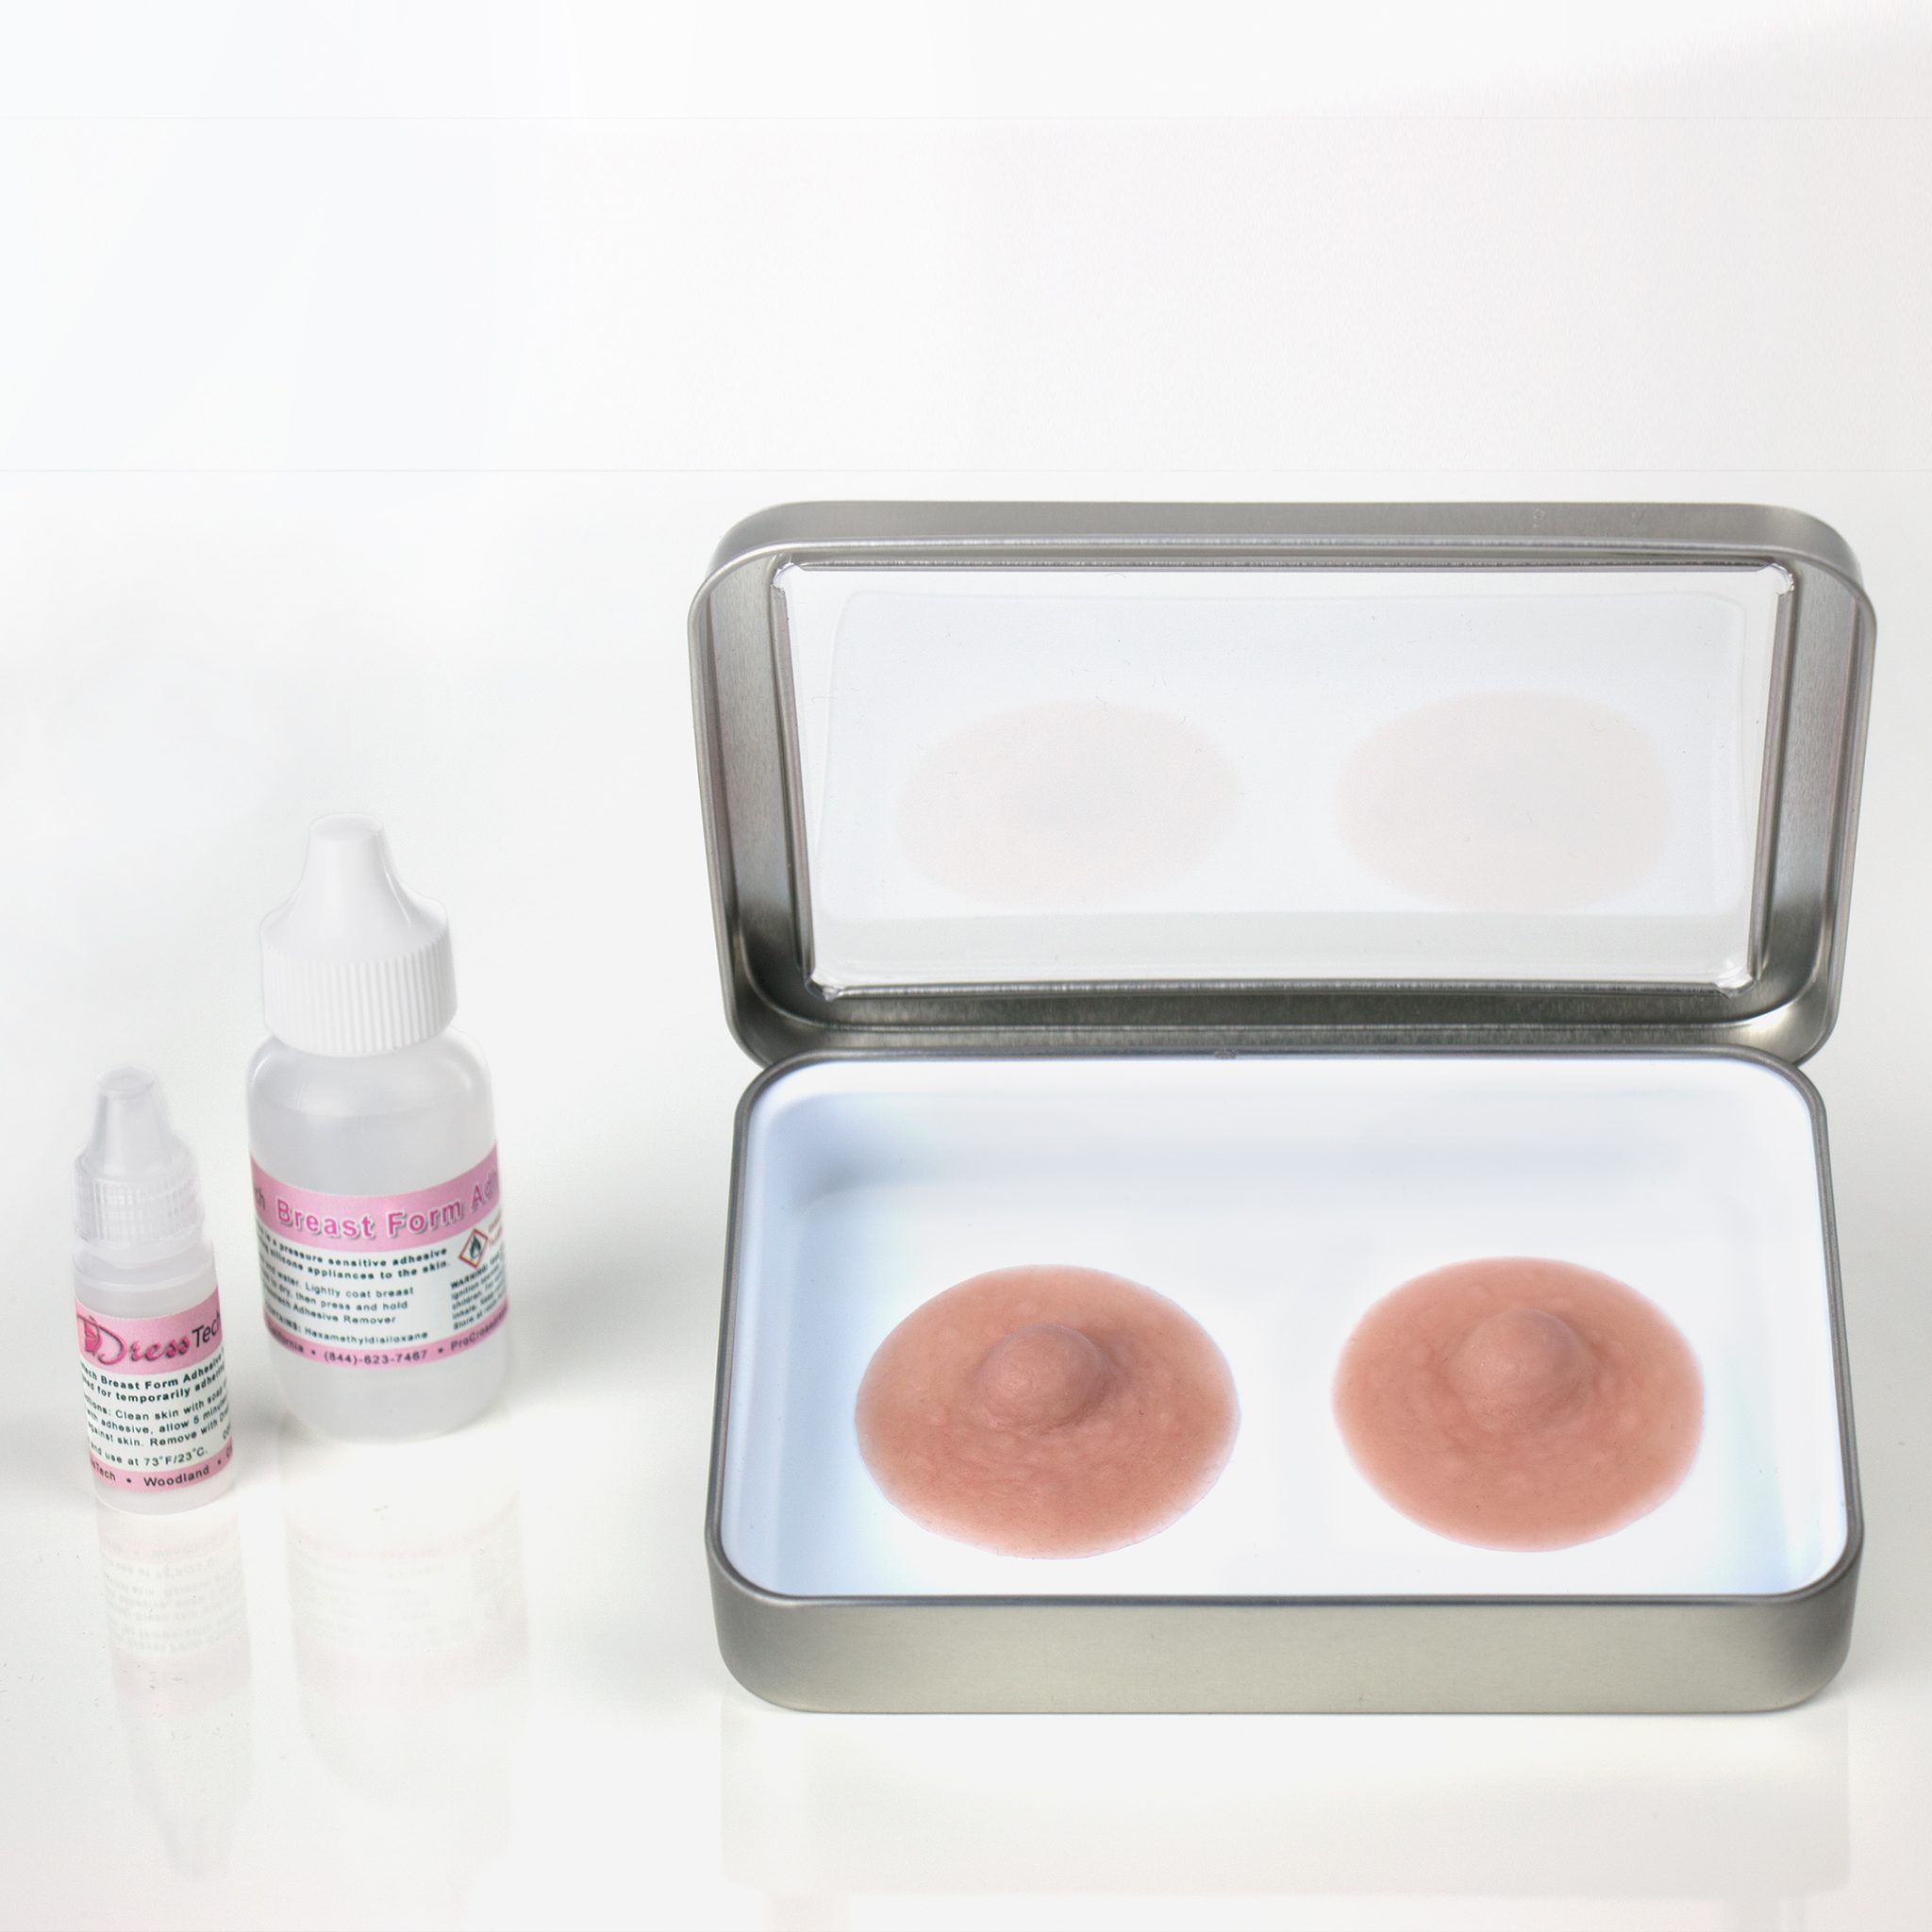
Skinister Perks Prosthetic Nipples
Your Skinister Perks Prosthetic Nipples will last for years with proper cleaning and care. Following these instructions will make sure your attach, remove, clean, and store your fake nipples properly.
Prosthetic Nipples Care and Cleaning
Handle Perks gently to avoid tearing and nail marks. Store prosthetics out of direct sunlight/uv and keep covered or inside your Proform Perks tin to keep them free of dust and debris. Perks can be cleaned with warm soapy water and air dried (see : “Adhesive Application & Removal” if you are removing adhesive. Adhesive should be removed with Skinister Perks Adhesive Remover, soap and soapy water or rubbing alcohol will not remove adhesive). The top of your Perks Prosthetic Nipples can be lightly dusted with Talc/Baby powder to help keep them clean and prevent dust etc. from sticking to the silicone.
Prosthetic Nipple Adhesive Application and Removal
All of our Skinister Perks Prosthetic Nipples kits come with a storage tin and a bottle of Perks Adhesive and Perks Adhesive Remover. The following step by step instructions are intended for using the adhesive and adhesive remover that came with your kit. Should you run out, additional Skinister Prosthetic Medical Adhesive and Skinister Prosthetic Medical Adhesive Remove can be purchased online.

Applying Adhesive
Step 1
Make sure the back of the synthetic nipple is clean and free of dirt, debris or old adhesive. Instructions for removing old adhesive is below.
Step 2
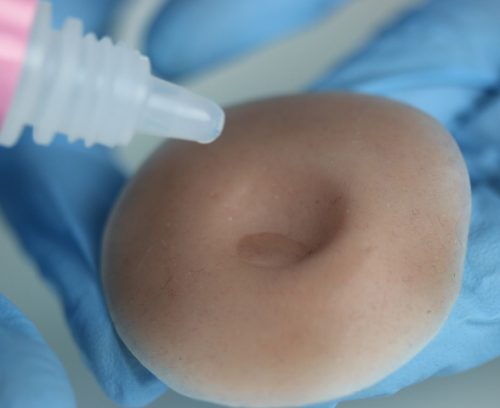
Apply 1-2 drops of Perks Adhesive into the center of the well on the back of the nipple while supporting the prosthetic in your other hand. Spread the adhesive quickly with your finger, brushing from the center of the nipple all the way to the edge or use a circular motion to move adhesive around and move it out toward the edges. It is important to work quickly as once the adhesive starts to become tacky it will become difficult to spread. Once a thin layer of adhesive has been evenly spread over the back of the nipple, place the nipple with back/adhesive side facing up and allow the adhesive air dry for 5 minutes before applying to skin.
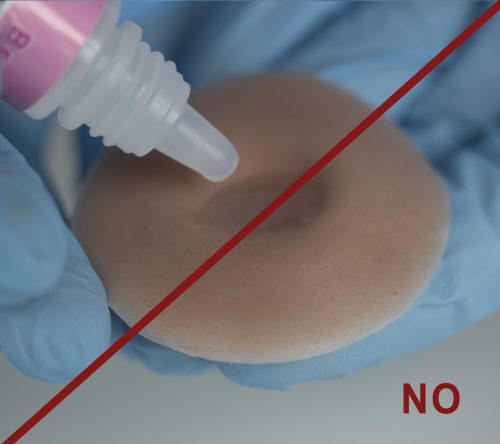
- Be careful not to use too much adhesive, a few drops will be sufficient. Too thick of a layer of adhesive will cause a poor bond with your skin or breast form and some of the adhesive could end up running over the edges of the prosthetic to the front side, which should be avoided.
- Be careful not to use too much adhesive, a few drops will be sufficient. Too thick of a layer of adhesive will cause a poor bond with your skin or breast form and some of the adhesive could end up running over the edges of the prosthetic to the front side, which should be avoided.
Step 3
Make sure your skin or breast form are clean and free of oils etc. Align prosthetic nipple over the center of your existing nipple or breast form nipple and push edges down to hold in place. Place the palm of your hand over the prosthetic and use gently even pressure for 1 minute to create a full bond.
- If you have hair around the contact area of the nipple, be aware that it make interfere with the adhesive’s ability to bond.
Removing Adhesive
Step 1
Remove the Perks Prosthetic Nipples from skin or breast form by gently peeling back in edge without twisting, tearing or digging fingernails into the silicone. Edges can be gently rubbed back towards the center of the nipple until it comes free from skin and can be lifted using finger tips.
Step 2
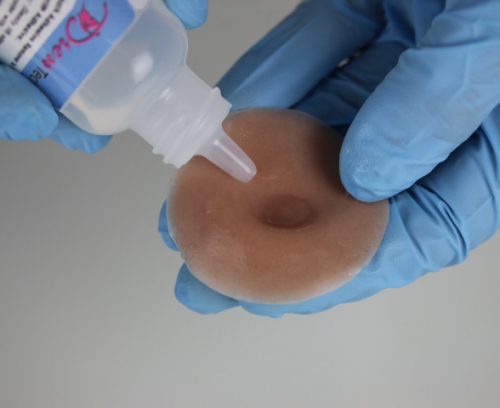
Apply a few drops of Perks Adhesive Remover to the back side of the nipple. Gently rub the Perks Adhesive Remover into the back of the nipple in a circular motion.
Step 3
Wash the nipple with warm soapy water to remove the adhesive remover residue and allow prosthetic to air dry face down. Place back in storage container to keep clean until ready for use. Do not apply new layer of adhesive until ready to use again.
Pierced Perks Prosthetic Nipples Tips
Step 1
Removing existing piercing: Unscrew the ball on either end of the piercing and slide out of the prosthetic nipple.
Step 2
Adding new piercing: Unscrew the ball on either end of the piercing.
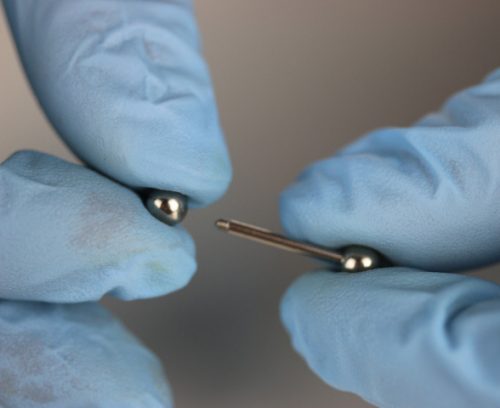
Step 3
Line up open end of piercing with hole in nipple from previous piercing.
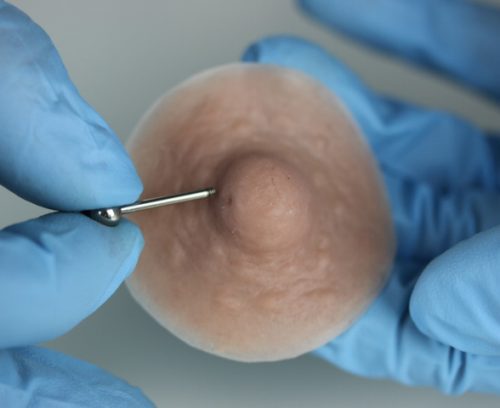
Step 4
Gently push piercing through nipple to hole opening on the opposite side. Be mindful of where the end of the piercing is, it may require redirection or steering to get it to come out the correct location on the other side. Be careful not to angle piercing down or up so that it comes out crooked or in an unintended location. The piecing should not go through and appear on the back side of the prosthetic.
Step 5
Once open end of piercing is through the other side, screw the end cap/ball back on (make sure threads are aligned) to secure piercing in place.
- Do not twist or pull piercing once it is in place as it can tear the silicone.
